A bigger gun.
Intro
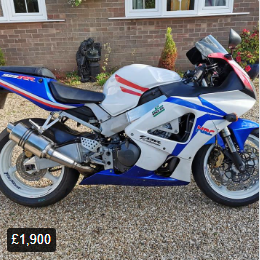
When I bought this Fireblade it was in need of a bit of TLC. First on the cards was that awful exhaust.
I like a bit of noise but the unrefined rasp of basically having no muffler at all is not my bag. Not to mention that, in my eyes, stubby cans look bloody awful!
It's a case in point that I didn't actually have any pictures of it so managed to get this screen grab from the Facebook sale thumbnail. It looks shit.
The bike, as standard, has a huge cannon of a silencer which would happily pass an MOT but is a little too tame for me so I went looking for a Goldilocks can.
Shopping
The fit of the exhaust is a three bolt flange which is specific to the RRY-RR3 Fireblades. As a result the price of these cans remains inflated. I struggled to find a decent one for under £100 till I came across a funny looking standard can for £30 It had a huge dent on the inside of it but it was clearly not a standard can for either the SC44 or 55, something was up.
After a bit of detective work I came to the conclusion that this was an Akrapovic titanium oval can with its sticker missing. At a £200+ price tag second hand, this was a bargain if I could fix it so I took the gamble and bought it.
After a bit of detective work I came to the conclusion that this was an Akrapovic titanium oval can with its sticker missing. At a £200+ price tag second hand, this was a bargain if I could fix it so I took the gamble and bought it.

Strip
First up the can needed stripping down.
This is simple enough: drill out the aluminium pop rivets with a drill bit the same size as the shaft (You need to guess this, I went 5mm) at one end. I always go for the base as that is normally the end you would remove on serviceable cans so, usually, the baffle will come out with it.
With the rivet heads drilled and heads removed with a pick, the shaft of each rivet can be knocked out with a drift.
 This allows the strap to ping off and then the sleeve can be removed. I had to work the inner baffle free from the cap end and help the base come free from the sleeve with some wd40. Once several years of grot had oozed out, the sleeve popped free.
This can has a nice quilted baffle wadding which slid off tidily revealing the two main parts of the can.
 Unlike most exhausts, the Akropovic is titanium through and through not just the outside. The only aluminium, the base cap looks solid from the outside but it has actually been machined to an enth on the inside really showing off what you are paying for with these high quality exhaust. Really nice to see.
Repair
 The inner baffle and sleeve were both dented as can be seen in the above images.
The inner baffle was an easy fix with a cheap pipe expander. These tools are pretty poor at what they are sold to do but what the actually do: returning a tube to a round profile, it does very well.
I simply posted the tool inside the baffle and opened it up with an impact gun. I hit it till the baffle was back to its original shape then reversed the tool and let it drop out the other end. An easy start.
I would suggest wearing gloves here as the titanium mesh tube is like a cheese grater, ask me how I know.
The outer sleeve was next.
 I started off with a slide hammer and dent pulling kit which would probably work great on a Chinese car body but couldn't grip the cans surface enough to pull a dent without overcoming the adhesive.
I was able to press out the bulk of the dent with a large hammer and some wood on the inside. The draw back of this was drawing a line in the surface of the outside edge of the can.
 The rest of the dent and other smaller imperfections were removed with a panel beating kit. I reacted from the inside of the sleeve with the anvil and hammered the outside with an outer radius then a finishing hammer. It is a bit counter intuitive to remove a dent by hitting it in but it really works. I wasn't going to chase perfection here, I have other things to do but a pretty good finish was achieved in under an hour.
All that was left to do now was to clean everything up and reassemble.
I had some new fibreglass wadding for the baffle but seeing as the original stuff was do good and still clean, I just refit it.
I inserted the base cap (the right way round) and refit the strap using some 5mm aluminium pop rivets. Getting the inner baffle tube to line up with the outset is a bit of fun ut some screwdrivers and patience got me there in the end.
All back together it looked really good with the cans shape back to the way it should be and only showing marks on closer inspection. A quick polish was all it really needed before fitting.
On the bike it looks ace and a reproduction metal sticker finished the look off perfectly. The bike looks far less ratty now and sounds perfect. I should probably buy a strap for it though.
 The strap was a bit of a bugger to find but after some digging I found out it's part number was PCCL5 from the Akrapovic exhaust IPC. https://d1sfhav1wboke3.cloudfront.net/ImageServer/Apim2media/Documents/100104/6875e288cbdc4b1d9ed06879ebdfb32b.pdf
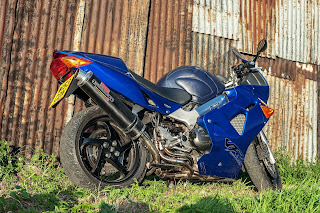
Comments
Post a Comment